Overview
Upstash Workflow lets you write durable, reliable and performant serverless functions. Get delivery guarantees, automatic retries on failure, scheduling and more without managing any infrastructure.Quickstarts
Upstash Workflow supports Next.js, Cloudflare Workers and many other frameworks in TypeScript and Python.Next.js
Build a Next.js application with QStash Workflow
Cloudflare Workers
Use and deploy Upstash Workflow on Cloudflare Workers
Next.js & FastAPI
Use Upstash Workflow for Python with Next.js and FastAPI
Key Features
Failure Resilience
If your platform experiences a temporary outage, your workflow can pick up right where it left off, ensuring stability even in unstable environments.
Long-Running Executions
Run long-running REST endpoints, such as complex AI models or video processing tools, even on serverless platforms with strict time limits.
Events with Wait/Notify Mechanism
Create workflows that wait for external events before proceeding. Ideal for user confirmations and asynchronous notifications.
Scheduled Jobs
Run jobs at regular intervals with support for cron expressions. Perfect for recurring tasks like reminders, reports, or newsletters.
Parallel Runs
Start independent tasks in parallel and wait for them to finish simultaneously, reducing latency.
Long Delays
Need your code to “sleep” for days, weeks, or even months? Supports long delays beyond serverless time limits.
Delivery Guarantees
Ensures at-least-once delivery. Failed requests are logged in a Dead Letter Queue to prevent data loss.
Flow Control
Prevent overwhelming your app or external services by configuring rate per second or parallelism limits.
Observability
Monitor workflow steps with insights. Filter events to track successes, failures, retries, and stalls.
Example Use Cases
Here are some example real world use-cases for Upstash Workflow:Agents
Use LLM Agents equipped with custom tools to achieve tasks
AI Data Processing
Download a large dataset without timeouts, process the data in chunks and generate a report.
Waiting For Events
Control workflow execution with events, log event data and send emails
Authorization Webhook
Start a workflow from a webhook. Handle user creation, trial management,
email reminders and notifications.
Customer Onboarding
Register a new user, send welcome emails, and periodically check and respond
to the user’s activity state with emails.
E-Commerce Order Fulfillment
Receive an order request, verify the stock, process the payment, and handle
order dispatch and customer notifications.
Image Processing
Manage uploading images to the data store. Apply filters and resize the
images to different resolutions in parallel.
Retry Payments
Retry payments with a day of delay, send emails, and suspend account if
payment fails after the retries.
How it works
Upstash Workflow builds on the principle of steps. Instead of defining a single, complex piece of business logic, workflows contain multiple individual steps. Each of the steps are executed by a separate request to your application, by preserving the output of previous steps. In case of an error, a failed step is retried individually without needing to re-run any previous steps. Instead of the entire business logic, each step can take up your serverless function execution duration, and many more benefits.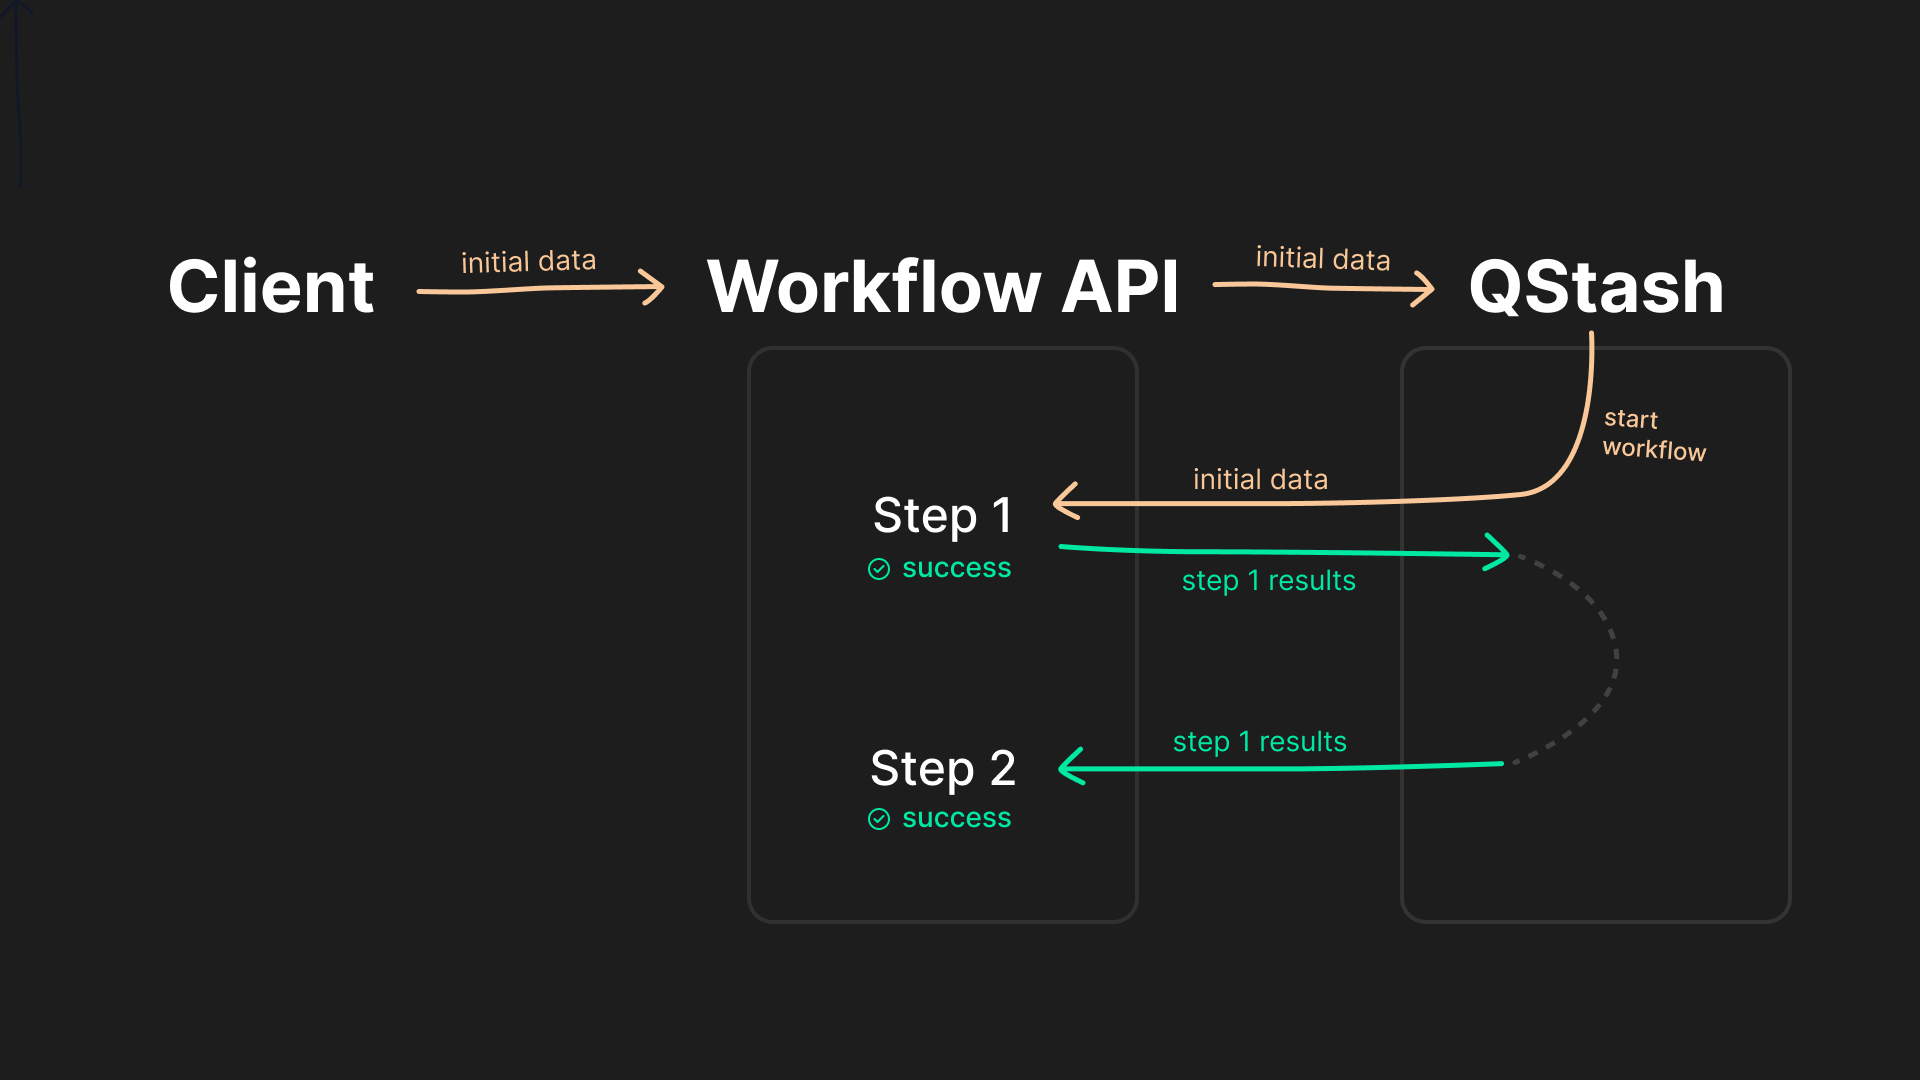
Support
Need help or have questions? We’re here to support you:- Join our Discord community to ask questions and share feedback
- Open a ticket through the Intercom chatbox in the dashboard for any issue